PhotobucketPhotobucketPhotobucketPhotobucketPhotobucket

1.21.2014

Winter Olympics Week {Olympics Re-Cap!}

 
Hello everyone!  Did you all enjoy your long weekend??  We basically just did a lot of de-junking and organizing...boring but necessary! ;)

I am SO excited to be focusing this week on the Winter Olympics with my kids, and to get started I thought I would share some really fun activities we have done in the past that could totally be adapted for this years Winter Olympics.

First up, we made some super-sized Olympic Torches!


It wouldn't be a weekly theme at our house if we didn't include a fun snack...check out our Olympic Rings snack AND Olympic Rings Countdown Chain.


Finally, if you are a Utah local, take your kids to the Olympic Cauldron Park.  It is totally free and they have so many fun and interesting things to look at, including the real torch from the 2002 Winter Olympics and SO much more!


Stop by tomorrow for some fun Winter Olympic crafts...and have a great day! :)


1.16.2014

Zodiac Sign Fun with the Kids!

As we are getting close to finishing up our week on the Chinese New Year I thought it would be fun to talk with the kids about all the different Zodiac Signs and find out which sign each of them are.

To get started I found this awesome Zodiac Sign printable at Spoonful.  It has each of the zodiac signs with the years that are attributed to that Zodiac.  It also has some strengths of each zodiac and shows what other signs you are compatible with.  Go HERE to print one out for yourself!


Once you discover what animal represents each of your children you can give them a Printable Mask of their animal to cut out while you read about their strengths ( and possibly wipe away some tears when one of your sweet little ones finds out her Zodiac sign is a pig and not the bunny she had hoped for ;)


After we looked at all the different signs we opened up our fortune cookies that we had made earlier in the day.  I had the kids guess what they thought the Zodiac sign was for 2014, and when we opened up all the cookies we took out the slips of paper and put all the letters together to find out the sign for this year...2014 is the year of the HORSE!
 

Tomorrow we are finishing off our week with some fun paper crafts so make sure you stop by!  Have a fantastic day!!


1.14.2014

Homemade Fortune Cookies...with a secret message inside! {Chinese New Year Theme}


Today we are sharing the Homemade Fortune Cookies we made, with a fun little twist!

Now, I attempted these cookies last night.  Honestly, after 3 batches...I had a whopping 8 fortune cookies that turned out ;)  They are quite simple to make, but not necessarily easy.  I found a fantastic blog that had beautiful pictures and great step-by-step instructions, so if you want to try these out make sure you stop by The Jew and the Carrot.


I changed the recipe up JUST a bit to use things I had or didn't have on hand.  Here is all that you need:

1/2 C sugar
1/2 C flour
1/2 tsp salt
2 egg whites
1/2 tsp vanilla
1/2 tsp almond extract

That's it!

Now, I'm sure you are supposed to mix the dry ingredients and then the wet ingredients and then mix them all together...does anyone do that?!  I never do...there is NO chance I am dirtying another bowl if I don't have too ;)  I bet that is just one of many reasons I am not a wonderful baker!!

Anyways, once I dumped everything in ONE bowl and mixed it up, I prepared my cookie sheet.  The first time I tried parchment paper, and that did not work at all for me.  I had much better luck when I sprayed a cookie sheet really well and put the mixture right on that.  It also took me quite a few tries to get the size right...a 3 inch circle is really what you are going for.  Anything else will taste fine but not look too authentic.


Bake these in the oven at 375 degrees for 5-7 minutes.  Mine actually took 8-9, you just need to watch really closely and take them out when they have browned nicely around the edges.
 

To make our fortune cookies a little more fun we put a secret message inside.  After school today we are learning about all of the different Chinese Zodiac signs, and what sign each of my kids are.  I thought it would be fun to put in each cookie a letter that when put with the others will make up the Chinese Zodiac for 2014!  

Ok, so once your cookies are done you need to flip them over with a spatula.  Then place a strip of paper in the middle and fold them in half.  Once you have done that place them over the rim of a cup or jar to give it that awesome fortune cookie shape.  You are going to want to do this pretty quickly to make sure they don't harden before you can shape them.


Once you have them shaped you can put them in a muffin tin to hold their shape until they harden. 


I gotta tell you...these fortune cookies are delicious!!  They are soft and a little chewy (probably because we can never wait long enough to let them harden!;) and have a yummy almond flavor.


Thanks so much for stopping by today, make sure to come back tomorrow to see some fun Zodiac activities for kids!!


1.13.2014

Chinese Dragon Masks {Chinese New Year Week}

We are so excited to be kicking off a new theme this week, we are learning and exploring all things about the Chinese New Year!  I have been especially excited because we have never done this theme before so its given me a chance to learn some new things too :)

I've mentioned before that Monday is usually our LEAST crafty day of the week.  It seems like I usually spend the day getting the house back into some kind of order after we trashed it all weekend long ;)  Today, though, I really wanted to get my kids away from the electronice, but also knew I didn't have much time.  This activity was quick, cheap and the kids had an absolute blast!  Check out our Chinese Dragon Masks!


To get started you want to print out your very own Dragon Masks.  I found this great template HERE at Spoonful.


Then let your little ones go to town coloring their dragons. 


Oh...and if you happen to have a little man that's not quite up to coloring, you can just stick him in the high chair and enjoy his cuteness ;)
 

While the kids were coloring I got out some crepe paper we had from past birthday celebrations and some fantastic Sparkle Elastic Cords we received from CraftProjectIdeas.com.  We use these cords several times a week for jewelry, but they were perfect for these masks as well!


All you need to do now is cut out your masks and the eye holes, tape some streamers onto the back and then tie the elastic cord around the mask so it stays up on your little dragon.


The best thing about crafts like these are they provide hours of creative play once you are done!  My kids were running around playing dragons and trying to scare each other for quite a while ;)

Thanks so much for stopping by today, and come back tomorrow!  We have more fun crafts and activities, and a yummy treat we are really excited to try out.


1.09.2014

Footprint Penguin Craft {Polar Animal Week}

 I may have mentioned before that I love handprint and footprint crafts, and when I saw some adorable footprint penguins HERE  I knew I wanted to do this fun craft with my little this week.

I was really excited to do this craft because let's be honest...I don't do NEARLY as many crafts with the kids I have at home now as I did with my first two.  I have a box FULL of handprints and footprints of my oldest two daughters, but the box is sadly lacking when it comes to my 4 year old son and 2 year old daughter.  Today was a great chance to add to that precious box just a little bit more, and even though I know its completely unrealistic to think I can do with 5 kids what I did with two...I have to at least give it a shot! ;)


Isn't this just the cutest little guy??  To get started the kids used cotton balls to paint some white snow on our paper.  Then came the really fun part ;)  The kids thought it was hilarious when I painted the bottoms of their feet black...its even more fun if your kids have particularly ticklish feet ;)

Once we stamped their foot down on the paper, we let the black paint dry and then I helped them paint the white body of the penguin.  We added flippers, a beak, eyes...and our cute little penguin was born!

This was a great craft for a slow morning when the kids may or may not have been driving me to the brink of insanity :)  Honestly, my baby has been sick for days and mommy with no sleep turns into Mean Mommy real quick.  I'm so glad I was able to put away the list of never-ending chores and giggle with my kids as I tickled their feet and laughed at the silly names they came up with for their penguins.  This is the real beauty of being a stay-at-home mommy.  These little moments that jump out at us from out of no where, and make us remember why we decided to do crazy things...possibly like have 5 children in 7 years or something like that ;)

Thank you so much for stopping by today, and keep checking in for more Polar Animal fun this week!!

1.08.2014

Feed the Penguins Math Games and Activities {Polar Animals Week}

 Hello everyone!  Is it absolutely freezing where you are this week?  It's not nearly as bad here as it is in other places...but it is definitely COLD :)

I thought this would be a perfect week to learn and explore all about Polar Animals, and we kicked off the week with some fun penguin activities that helped us work on simple math skill and enjoying a fun rhyme too :)

First up, I made this printable with six cute penguins.  I printed them out on cardstock and we used them for 3 different activities.


To get started on your penguin fun you just need your printed-out penguins and some Goldfish crackers.


Then I just made 3 separate piles on our table of goldfish.  I had my little preschooler identify how many goldfish were in each pile, and then find the penguin with that number and put it next to the fish.  This was a great way to work on not only counting, but also recognizing each number as well.


Next up I wanted to focus on simple addition so we came up with our Feed the Penguins Math Game! :)


To get started I taped each of the penguins to a craft stick to make our Penguin Puppets.  Then we got out a plastic cup and had my little guy pick out two penguins to stick in the cups.  When he had his penguins in the cup he would add up the numbers on the penguins and "FEED" the penguins by putting that many goldfish into the cup.  It actually turned out to be tons of fun, and my little guy worked on simple addition problems for over 30 minutes!

Finally, since I already had our Penguin Puppets we used them to act out this darling poem I found and made a printable for.


My two-year old especially enjoyed acting out the rhyme and has been playing with those silly little penguins all afternoon ;)

I hope you enjoyed our penguin activities and come back later this week for more penguin fun, plus polar bears and LOTS more! :)


1.06.2014

Respect Family Home Evening

Happy New Year everyone!!  I hope you and your families have had a good 2014 so far...and what better way to start off the new year than with a fun family home evening teaching a GREAT principle?! ;)

I previously posted this over at the amazing blog Or So She Says... but I wanted to share it here today in case any of you missed it.  I have been wanting to come up with a fun and interesting way to teach my kids about respect for a while now and I was really excited about how this fhe turned out.

To get started I had to think...what does respect mean to me and what do I want it to mean to my children?
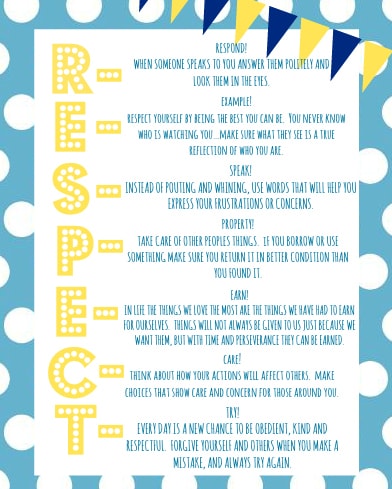
I came up with this printable that will hang in our home throughout the week as a great reminder of some of the ways we can show respect in our lives.  I just took each letter of the word RESPECT and came up with key words to use as gentle reminders for all of us :)

respect2

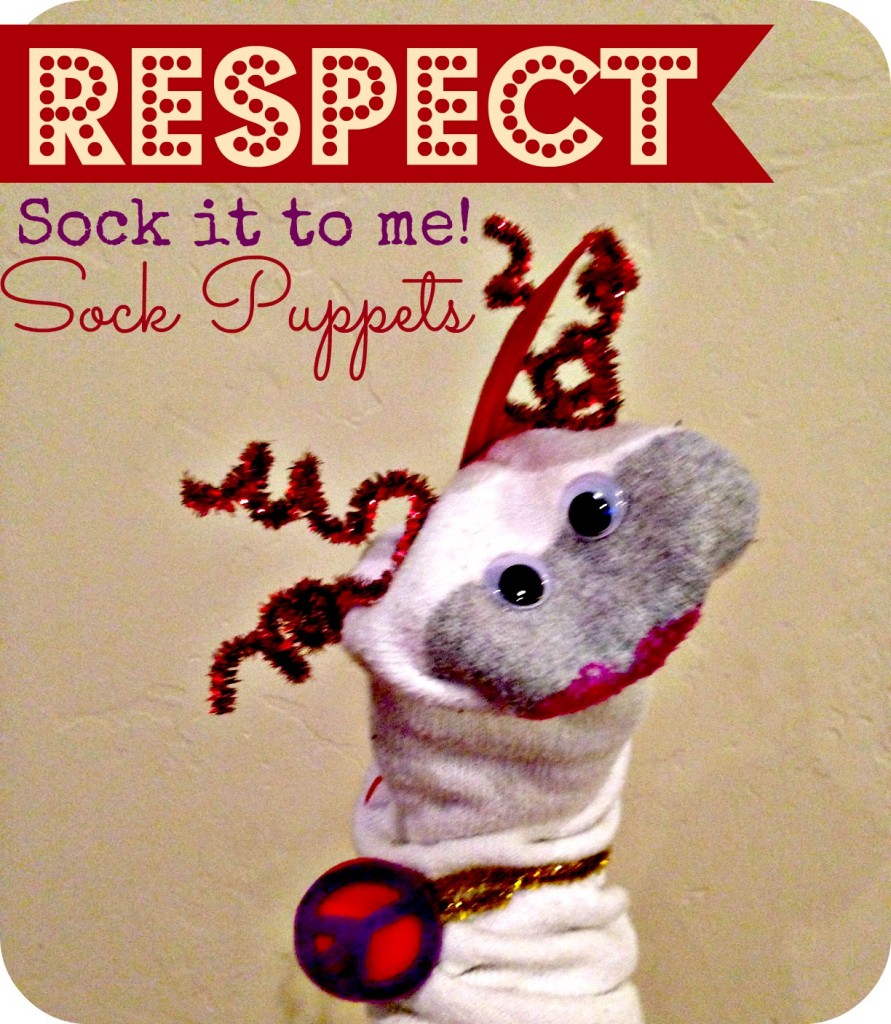
We went through letter by letter, and discussed ways we can be more respectful in our lives. After that it was time for the FUN!  First things first...we needed some theme music.  And there is only one obvious choice...blasting a little Aretha Franklin ;)  As we listened to that great classic, I got out all the supplies we needed to make our very own... R-E-S-P-E-C-T Sock it to me Sock Puppets!

photo (100)

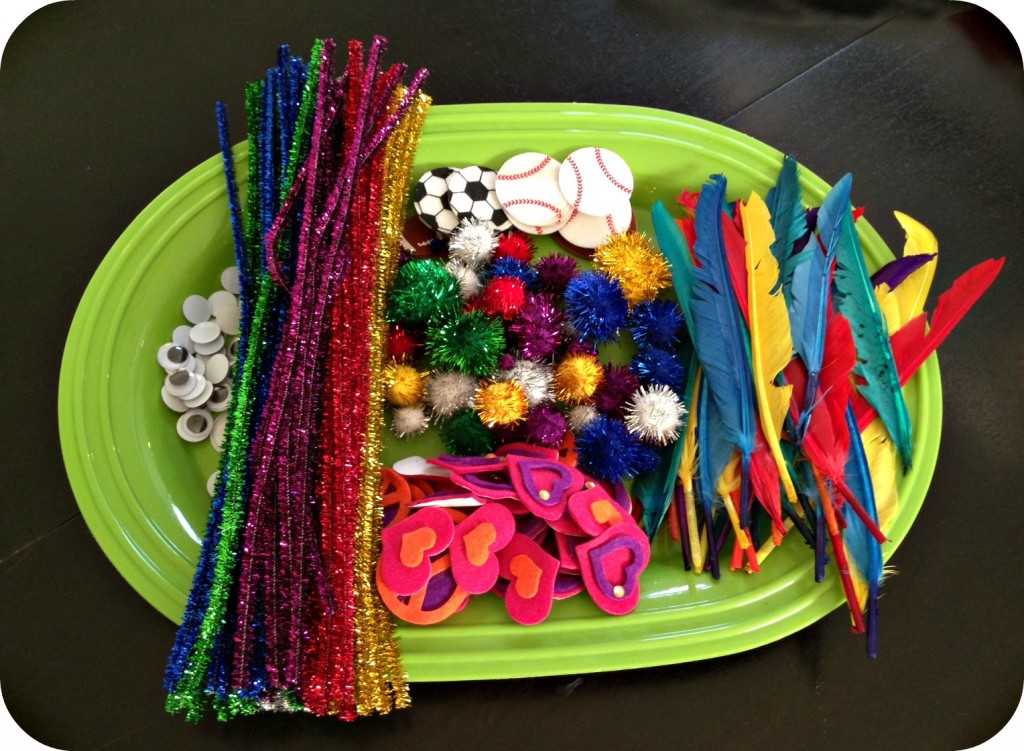
To make our puppets we just got a bunch of old white socks and all the random art supplies we could find!  Things like googly eyes, pipe cleaners, pom-poms, feathers and stickers.

photo (97)

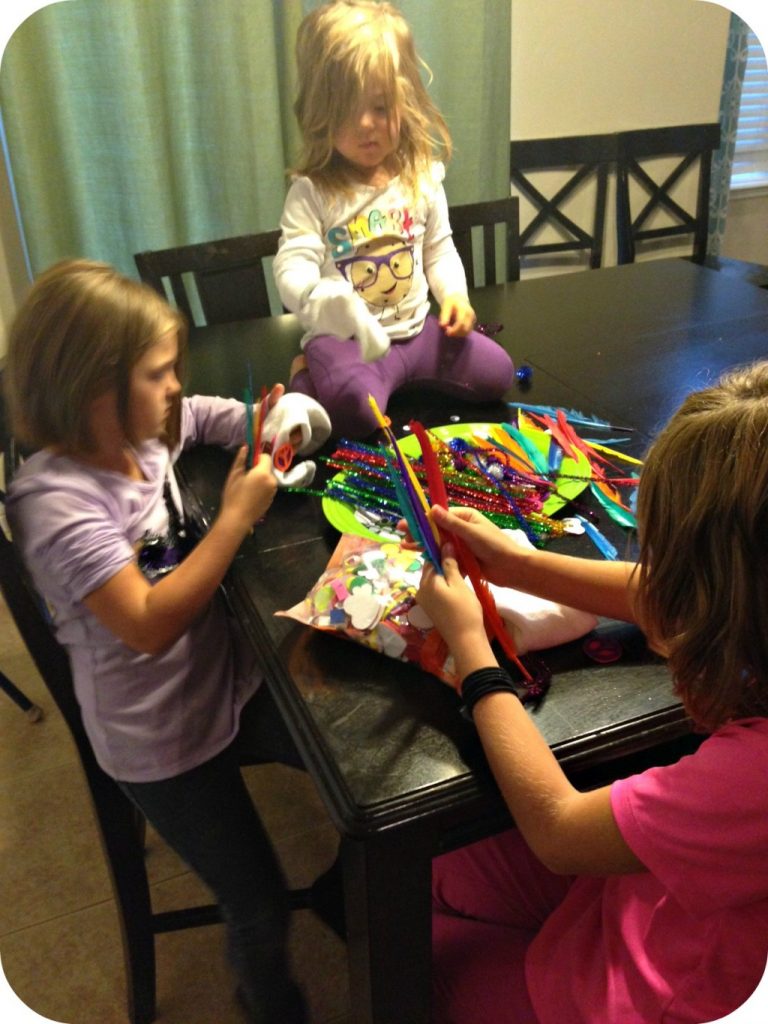
Once you have all your supplies get your glue gun ready and let your kids imaginations go wild!

photo (98)

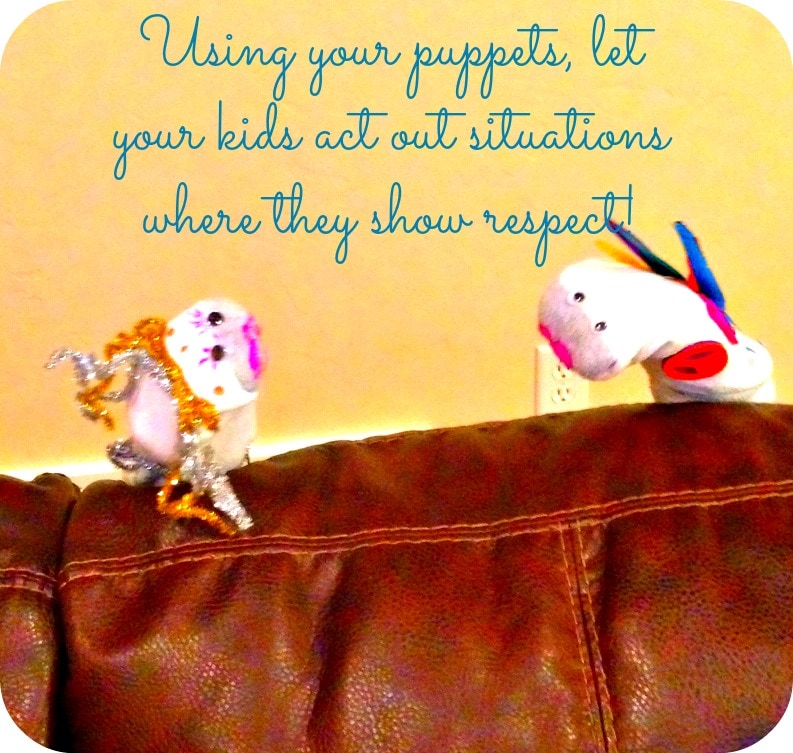
Now that you have your Sock it to me Sock Puppets ready to go, its time to let your kids really get involved and understand RESPECT in real-life situations.

photo (99)

My kids loved acting out different scenarios where they showed respect for others property, responded to others in a respectful way, and obeyed mom and dad.  I think they got a kick out of acting out what-NOT-to-do scenarios too ;)  This is a great way to apply the lessons you just taught to your children, and show them how they can be used in their day-to-day lives.

Next week we will be back with another FHE, picking up where we left off in the Book of Mormon.  Yes...we were supposed to finish that in one year, but it is better late than never right?!  Thanks so much for stopping by!